Those new to wide-format printing, and even some veterans, often give short shrift to what happens to a print once it comes off press.
But in reality, it's the finishing stage where any given job actually comes together, where the printed graphic is turned into an actual product, be that a retail display board or a vehicle graphic. So, it’s usually best to plan the finishing first, although in most cases the application will determine the type of media to be used and therefore the most appropriate printing and finishing.
The most common form of finishing for rigid materials is to cut a specific shape, for example, cutting around the shape of a superhero for a display advertising a new movie, or simply cutting the flaps to create a dump box.
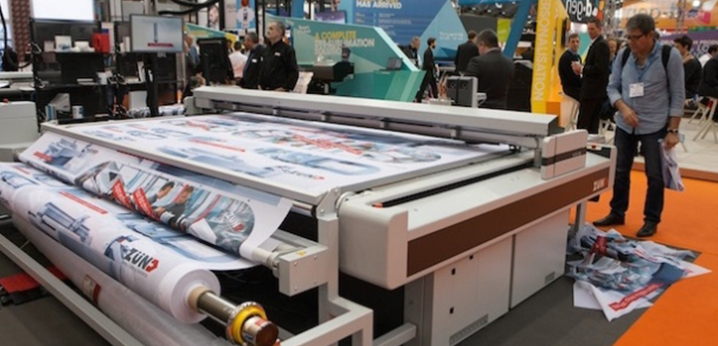
For this sort of work, one will need a cutting table, and since these kinds of jobs are typical uses for most flatbed printers, it's quite common to find cutting tables sold alongside printers.
There are quite a lot of different cutting tables to choose from, with different sizes and features, and wildly varying prices. In general, the cutting table should last longer than a printer, and one table should be able to handle the output from several printers.
Most cutting tables should be able to cut through vinyl, cardboard and foamcore, as well as some plastics such as acrylic and some light wood panels. Most will struggle to cut through metal but should be able to handle aluminium composites such as Dibond.
There are several options to look for, such as a vision registration system and a workflow system that can recognize jobs through barcodes and set up appropriate cutting patterns.
It goes without saying that users will want to choose a good range of cutting tools, including drag knives and tangential cutters as well as routers. Most cutting tables should offer some form of automatic tool changing, which means that the machine can be left unattended for longer periods.
Another important consideration is loading and unloading. In some cases, it’s possible to work on one side of a cutting table, whilst preparing the next job on the other half of the bed. In recent years, both Zund and Esko have demonstrated robots capable of unloading finished jobs.
This can greatly speed up the overall productivity, particularly if the cutting table has a conveyor system that can drop the waste into a bin.
Routers
In some cases, users may also need a CNC router, which generally offers a heavier duty approach than a cutting table with a much more powerful spindle.
Routers are the best option for cutting through dense materials like wood and aluminium composite, where users will need a powerful cutting tool to ensure as smooth a cut as possible. If the cut is not smooth then user may need to spend additional time sanding it.
In addition, users can expect to find most of the same option on a router as a cutting table, such as cameras for registration and automatic tool changers. However, routers generally need a much more robust frame, with servo motors to control the movement of the gantry as vibration will be more of an issue when cutting these dense materials.
Cutting plotters
So far we’ve mostly looked at cutting options for rigid materials but there are also several cutting plotters, which are mainly used for cutting printed stickers, decals and even short run labelling from flexible media.
Typically, they are capable of both straight-through and perforated cuts as well as cutting through the main material but not the backing liner to create stickers that can be peeled off a sheet.
The alternative is to buy a printer with a built-in cutter that can print and finish the job in one go. Generally, a separate cutting plotter will give more flexibility on substrates and be more productive, while printer/cutters tend to be more cost-effective.
Laminating
Laminating is not as widely used as it once was, though there are still some good uses for it. It used to be the case that flexible media prints would be laminated to boards but since the advent of flatbed UV printers most people simply print direct to rigid media, which cuts out the intermediate laminating step.
These days laminating is most commonly used for vehicle graphics to protect the graphics. Many suppliers, most notably 3M, will guarantee the life of the graphic - typically up to nine years - if it is printed with a specified inkset and laminated with a matching film.
This neatly illustrates the main purpose of laminating - to protect a graphic from the elements. This can include UV protection, to ensure that the colours don't fade but also protection from weather and moisture ingress as well as from scratching and vandalism. However, laminates can also be used to change the look and feel of a graphic, perhaps to add a glossy effect to the matte look typical of many UV printers, or to add a textured feel to the surface or even to make the colours appear more vibrant.
It is of course possible to laminate a rigid board but if the job needs to be laminated anyway then it may prove more cost effective to print it on a solvent printer and laminate it to a board.
Essentially a laminate is a film with an adhesive on one side, protected by a release liner. Laminating machines push the graphic against the laminate whilst managing the removal of the release liner.
There are three different approaches, with arguably the most effective being heat activated laminates. The rollers of the laminator are heated, which activates the adhesive so that it only requires a small amount of pressure to fix the graphic to the laminate.
These laminators tend to be more expensive and require considerable skill, mainly to manage the temperature, but can produce excellent results. The alternative is to use a cold laminator, which just uses pressure to activate the adhesive, making the laminators both cheaper and much easier to use.
An interesting variation on this is to use a flatbed applicator, which is mainly used for mounting prints to boards. Essentially these consist of a large table that holds the board still while a roller on a gantry passes over it, applying pressure to the laminate. They are easy to use and can be highly productive.
The third option is liquid laminating. Such laminators tend to be expensive, but the liquid laminate is usually much cheaper than using films. There is usually a choice of different finishes, such as matte or glossy, though they don’t offer the same level of protection as a film laminate would. Such systems can be highly productive and suitable for high volume users.
Grommets and sewing machines
Finally, most flexible graphics will need a hanging system added for installation. Typically, this means adding hem pockets down the edges that can be used to fix the sign in place.
There are several sewing machines designed specifically for working with textile signage as well as welders for working with PVC banners, not to mention grommeting machines that can be used with vinyl and tarpaulins. For all these machines, the main issue is to ensure that they can work with very large banners and that the quality of the finish won’t affect the graphic.
www.jackysbiz.com


